How to Cook a Brined Turkey in a Bag (Perfect Every Time!)
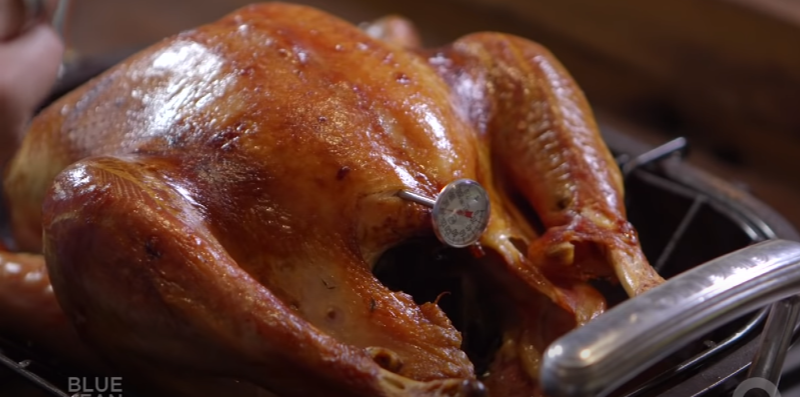
Cooking a brined turkey in a bag is a foolproof method to ensure a juicy, flavorful bird that’s perfect every time. The process involves immersing the turkey in a salt-based solution, which enhances its moisture and taste, followed by cooking it in an oven bag, locking in flavors and ensuring even cooking. This method simplifies the cooking process, reduces cooking time, and virtually eliminates the risk of ending up with a dry turkey.
In this guide, we will walk you through the steps of brining your turkey, preparing it for the oven, and cooking it to perfection in a bag. Whether you’re a seasoned chef or a first-time cook, this method is straightforward and yields consistently excellent results. Say goodbye to the stress of holiday cooking and hello to a tender, moist, and delicious turkey that’s sure to impress your guests.

| Step | Instructions | Time |
|---|---|---|
| 1 | Preheat oven to 325 degrees F (165 degrees C). | 15 minutes |
| 2 | Remove the turkey from the brine and rinse it under cold water. | 5 minutes |
| 3 | Pat the turkey dry with paper towels. | 5 minutes |
| 4 | Place the turkey in a large roasting bag. | 5 minutes |
| 5 | Pour the brine over the turkey. | 5 minutes |
| 6 | Close the bag and seal it tightly. | 5 minutes |
| 7 | Place the turkey in a roasting pan. | 5 minutes |
| 8 | Roast the turkey for 2 1/2 to 3 hours, or until the internal temperature reaches 165 degrees F (74 degrees C). | 2 1/2 to 3 hours |
| 9 | Let the turkey rest for 15 minutes before carving. | 15 minutes |
Brining the Turkey
What is Brining?
Brining is a process of soaking meat in a salt-water solution before cooking. The salt in the brine solution helps to break down the proteins in the meat, making it more tender and juicy. Brining also helps to add flavor to the meat.
How to Brine a Turkey
To brine a turkey, you will need the following ingredients:
A large container (such as a cooler or a stockpot)
Water
Salt
Sugar
Optional spices and herbs
To brine the turkey, follow these steps
1. Fill the container with cold water.
2. Add the salt, sugar, and any desired spices or herbs.
3. Stir until the salt and sugar are dissolved.
4. Submerge the turkey in the brine solution.
5. Cover the container and refrigerate for 12-24 hours.
Brining Time and Temperature
The length of time you brine the turkey will depend on its size. A small turkey (8-12 pounds) should be brined for 12 hours, while a large turkey (16-20 pounds) should be brined for 24 hours.
The temperature of the brine solution is also important. The ideal temperature for brining is between 35-40 degrees Fahrenheit. If the brine solution is too warm, the turkey will cook too quickly and will not be as tender. If the brine solution is too cold, the turkey will not absorb the salt and sugar properly.
Benefits of Brining a Turkey
Brining a turkey has several benefits, including:
Makes the turkey more tender and juicy Adds flavor to the meat Helps to keep the turkey moist during cooking Reduces the amount of time the turkey needs to cook
Cooking the Turkey in a Bag
What is a Turkey Bag?
A turkey bag is a large, heavy-duty bag that is designed specifically for cooking turkeys. Turkey bags are made of a non-stick material that helps to prevent the turkey from sticking to the bag. They also have a built-in steam vent that helps to keep the turkey moist during cooking.
How to Cook a Turkey in a Bag
To cook a turkey in a bag, you will need the following ingredients:
A turkey
A turkey bag
A roasting pan
Cooking oil
Salt and pepper
Optional stuffing
To cook the turkey in a bag, follow these steps:
1. Preheat the oven to 325 degrees Fahrenheit.
2. Rinse the turkey and pat it dry with paper towels.
3. Season the turkey with salt and pepper.
4. If desired, stuff the turkey.
5. Place the turkey in the turkey bag.
6. Fold the top of the bag over and seal it with a clothespin or kitchen twine.
7. Place the turkey in a roasting pan and pour 1 cup of water into the pan.
8. Cook the turkey for 15 minutes per pound, or until the internal temperature reaches 165 degrees Fahrenheit.
9. Let the turkey rest for 10 minutes before carving.
Cooking Time and Temperature
The cooking time for a turkey in a bag will depend on its size. A small turkey (8-12 pounds) will take about 3 hours to cook, while a large turkey (16-20 pounds) will take about 4 hours to cook.
The temperature of the oven is also important. The ideal temperature for cooking a turkey in a bag is 325 degrees Fahrenheit. If the oven is too hot, the turkey will cook too quickly and will not be as tender. If the oven is too cold, the turkey will not cook evenly.
Benefits of Cooking a Turkey in a Bag
Cooking a turkey in a bag has several benefits, including:
The turkey is more evenly cooked
The turkey is moist and flavorful
The turkey is easy to carve
The turkey is less likely to dry out
Brining and cooking a turkey in a bag are two great ways to ensure that you have a delicious and juicy turkey for your next holiday meal. By following these simple steps, you can easily cook a turkey that everyone will love.
How to Carve a Turkey
Carving a turkey can seem like a daunting task, but it’s actually quite simple. With a few simple steps, you can easily carve a beautiful and delicious turkey for your family and friends.
Step 1: Remove the giblets
Before you can start carving the turkey, you need to remove the giblets. The giblets are the internal organs of the turkey, and they’re usually found in a bag inside the cavity. To remove the giblets, carefully cut open the bag and remove the contents. Rinse the giblets under cold water, and then set them aside.
Step 2: Remove the legs
The next step is to remove the legs. To do this, start by cutting through the skin between the leg and the body. Then, cut through the joint at the thigh, and carefully remove the leg. Repeat this process for the other leg.
Step 3: Remove the wings
To remove the wings, start by cutting through the skin between the wing and the body. Then, cut through the joint at the shoulder, and carefully remove the wing. Repeat this process for the other wing.
Step 4: Remove the breast meat
The breast meat is the largest and most important part of the turkey. To remove the breast meat, start by cutting along the breastbone. Then, cut down each side of the breastbone, and carefully remove the breast meat.
Step 5: Carve the breast meat
Once you’ve removed the breast meat, you can carve it into slices. To do this, start by cutting down the center of the breast meat. Then, cut across the breast meat at an angle, creating thin slices.
Step 6: Carve the thighs and drumsticks
The thighs and drumsticks are the most flavorful parts of the turkey. To carve them, start by cutting through the skin between the thigh and the drumstick. Then, cut through the joint at the knee, and carefully remove the thigh. Repeat this process for the other thigh. To carve the drumsticks, simply cut them in half lengthwise.
Step 7: Serve the turkey
Once you’ve carved the turkey, you can serve it immediately. Be sure to let the turkey rest for a few minutes before carving it, so that the juices have a chance to redistribute.
Tips for Making the Perfect Turkey
Here are a few tips for making the perfect turkey:
Start with a fresh turkey. The best turkeys are those that are fresh, not frozen. Look for a turkey that has a bright, yellow skin and firm flesh.
Rub the turkey with a flavorful brine. Brining the turkey before cooking it will help to keep it moist and flavorful. You can use a store-bought brine or make your own.
Cook the turkey at a low temperature. Cooking the turkey at a low temperature will help to prevent it from drying out. Cook the turkey to an internal temperature of 165 degrees Fahrenheit.
Let the turkey rest before carving it. Let the turkey rest for at least 30 minutes before carving it. This will allow the juices to redistribute, resulting in a more flavorful and juicy turkey.
Storing Leftover Turkey
If you have any leftover turkey, you can store it in the refrigerator for up to 3 days or in the freezer for up to 3 months. To store the turkey in the refrigerator, wrap it tightly in plastic wrap or aluminum foil. To store the turkey in the freezer, wrap it tightly in plastic wrap, then place it in a freezer bag.
How to Serve a Turkey
There are many different ways to serve a turkey. Here are a few ideas:
Whole roasted turkey. This is the traditional way to serve a turkey. Simply roast the turkey until it’s cooked through, and then carve it and serve it with your favorite sides.
Turkey breast. If you’re only serving a few people, you can roast the turkey breast instead of the whole turkey. This will save you time and money.
Turkey leftovers. There are endless possibilities for using up turkey leftovers. You can make soup, sandwiches, casseroles, or even pizza.
Side Dishes for Turkey
There are many different side dishes that you can serve with turkey. Here are a few of our favorites:
Mashed potatoes
Stuffing
Green bean casserole
Cranberry sauce
Sweet potato casserole
Cornbread dressing
Rolls
Vegetables
Frequently Asked Questions
Author Profile

-
Hello, fellow turkey enthusiasts! I'm Mike Thompson, a proud resident of the picturesque state of Missouri, renowned for its thriving turkey population and favorable hunting conditions. For over a decade, I've roamed the woods, valleys, and peaks of our beautiful state, learning every nook, cranny, and secret that turkey hunting has to offer. My track record? Well, let's just say I've bagged more turkeys than there are days in November, and each hunt has added a story to my ever-growing book of experiences.
However, as much as I love the thrill of the hunt, what truly fuels my passion is the joy of sharing my knowledge with others. That's why I created this platform. This site is not just a testament to my journey but a beacon for all those who are looking to embark on their own turkey hunting adventures. Whether you're a beginner eager to get started or a seasoned pro seeking advanced tips, you'll find a wealth of information here.
From understanding turkey behavior, tracking techniques, and the best equipment to use, to the do's and don'ts of turkey hunting, this site is a comprehensive guide to all things turkey. So, strap on your boots, pick up your gear, and let's embark on a journey together into the world of turkey hunting. Welcome to my site, and happy hunting!
Latest entries
- October 26, 2023Turkey CookingShould You Truss Your Turkey? The Pros and Cons
- October 26, 2023Turkey RecipeTrader Joe’s Turkey Bolognese: 5 Delicious Recipes to Try
- October 26, 2023Turkey RecipeJennie O Oven Ready Boneless Turkey Breast: The Perfect Holiday Protein
- October 26, 2023Turkey CookingHow Long Can Ground Turkey Last in the Refrigerator?
